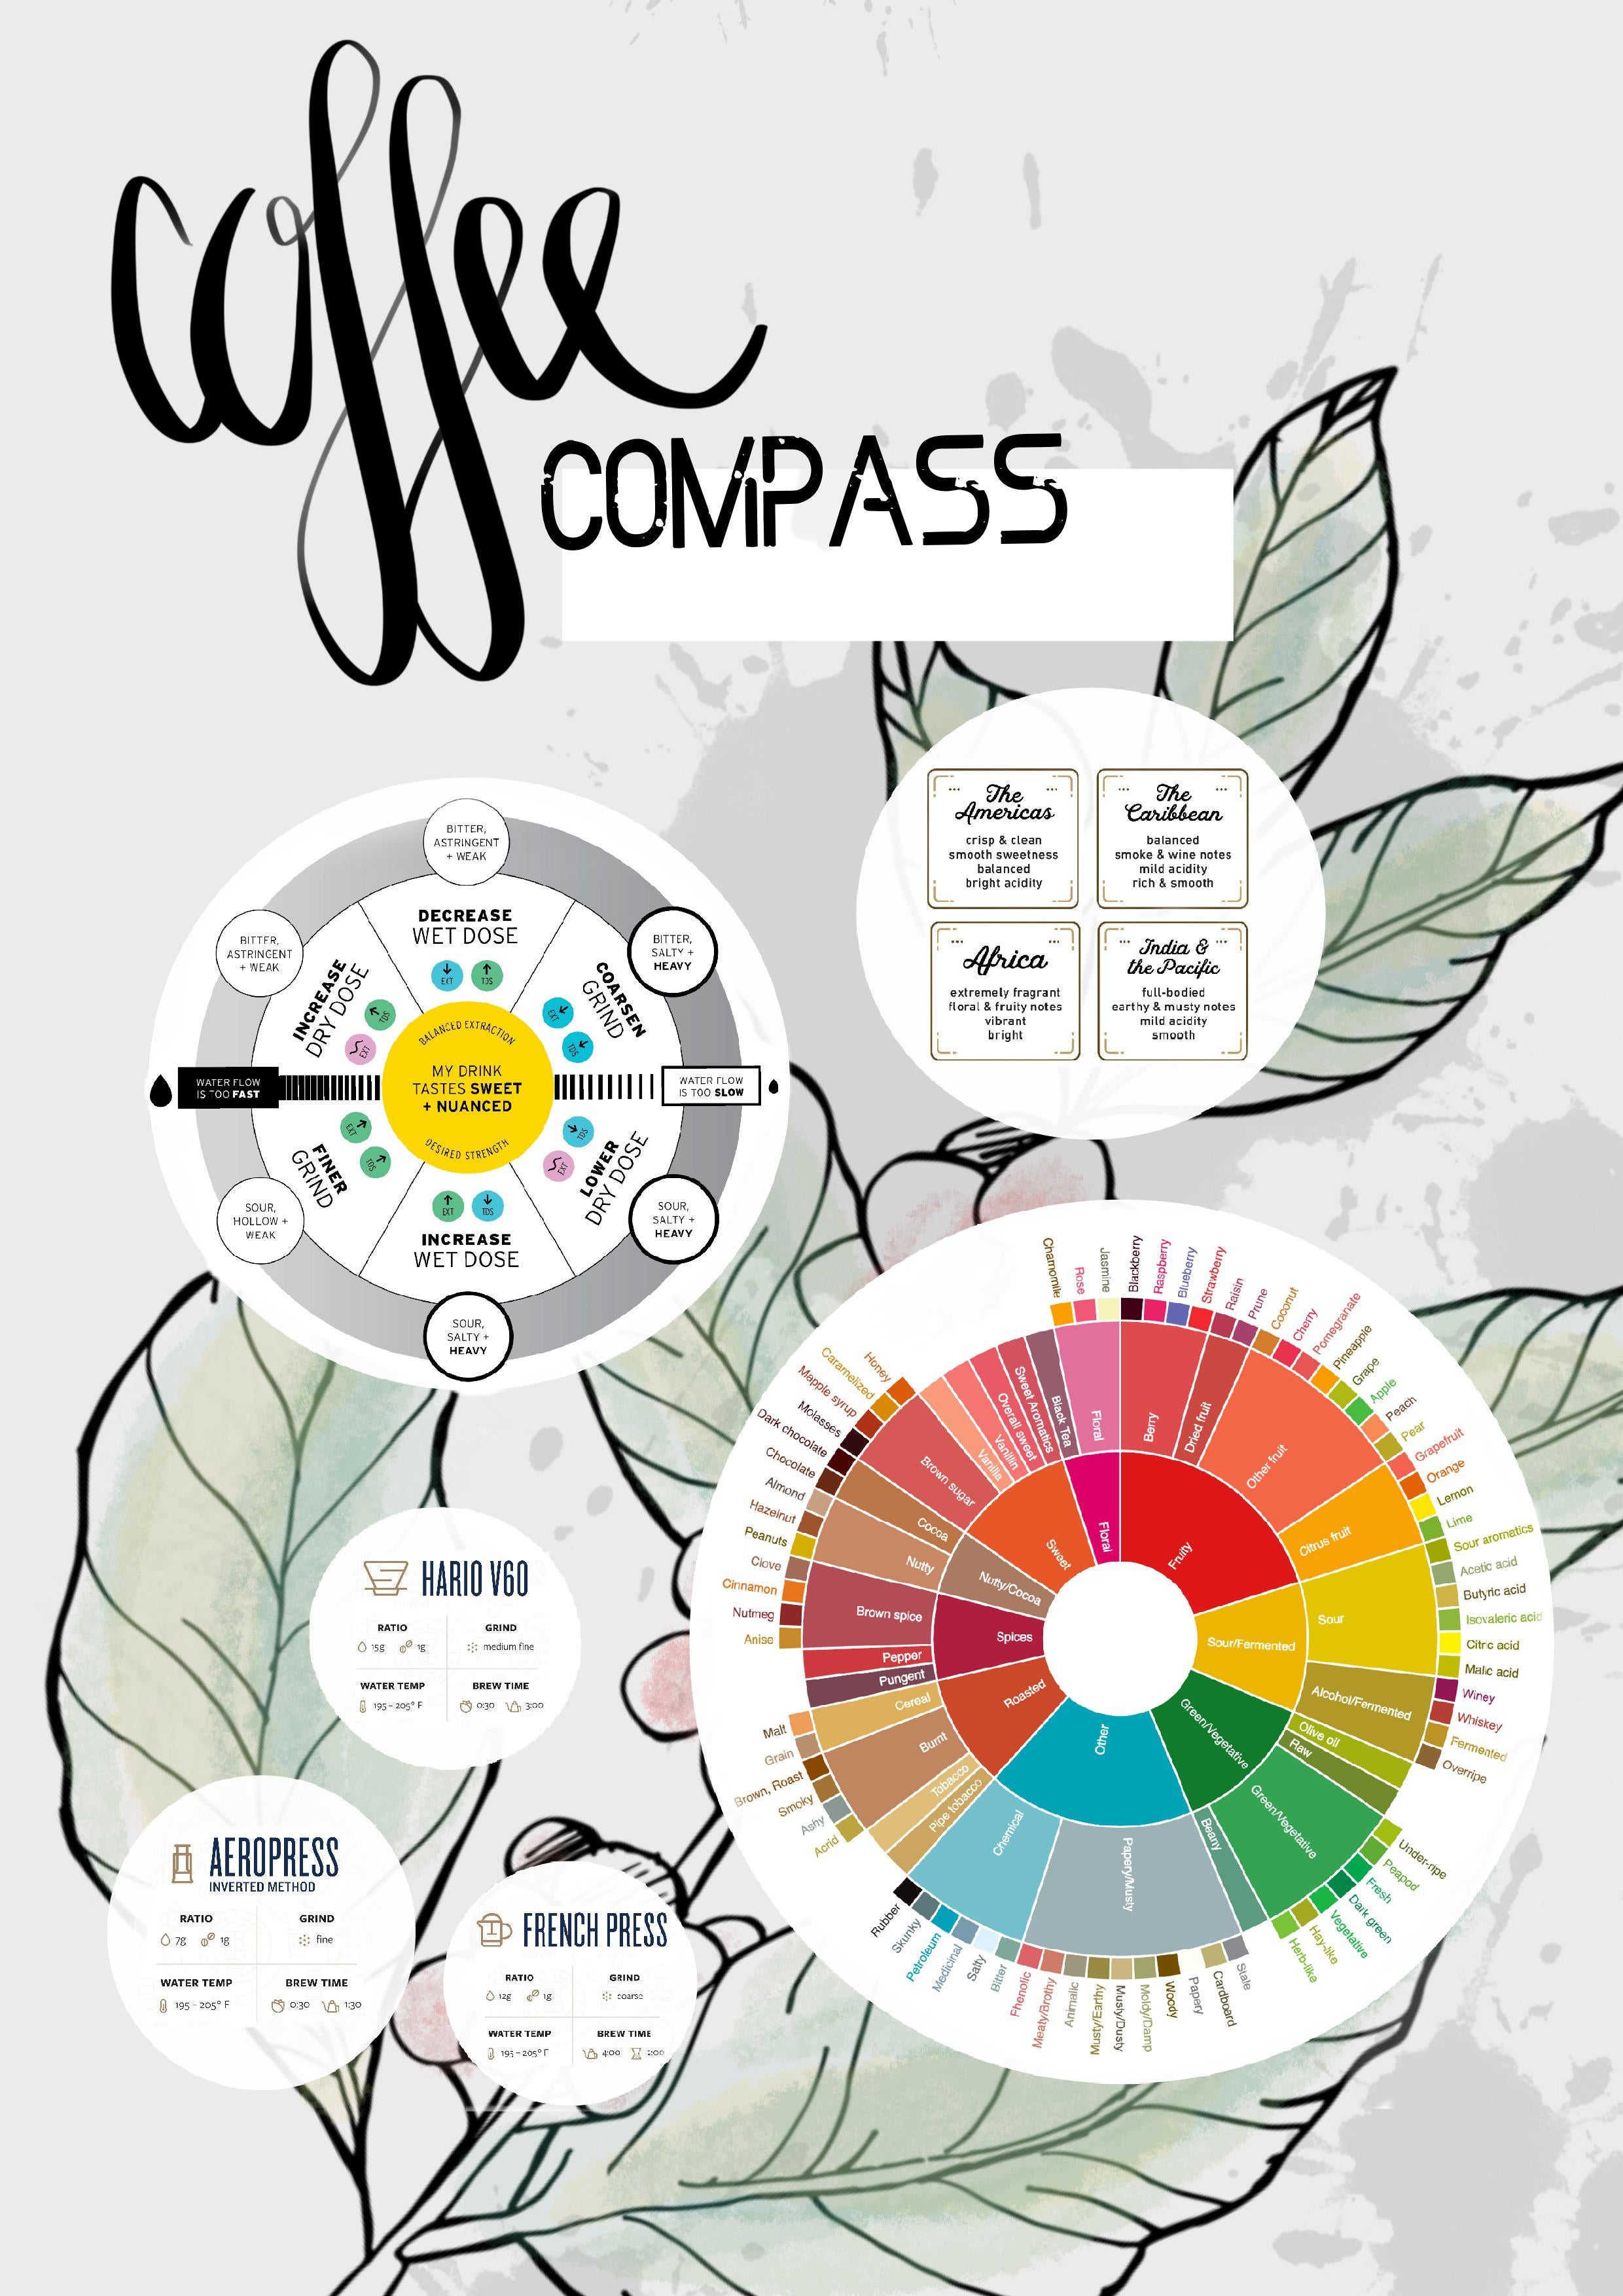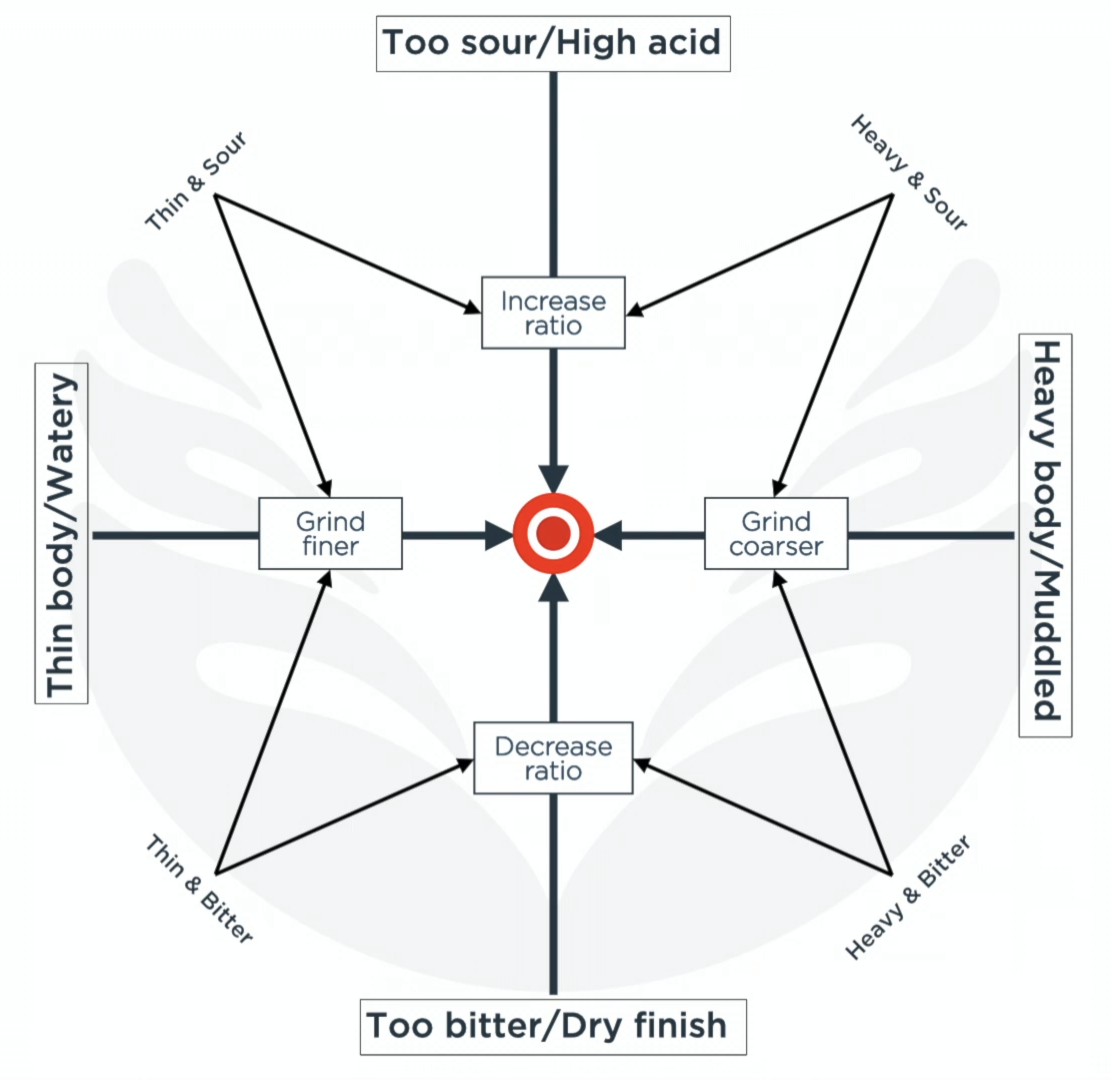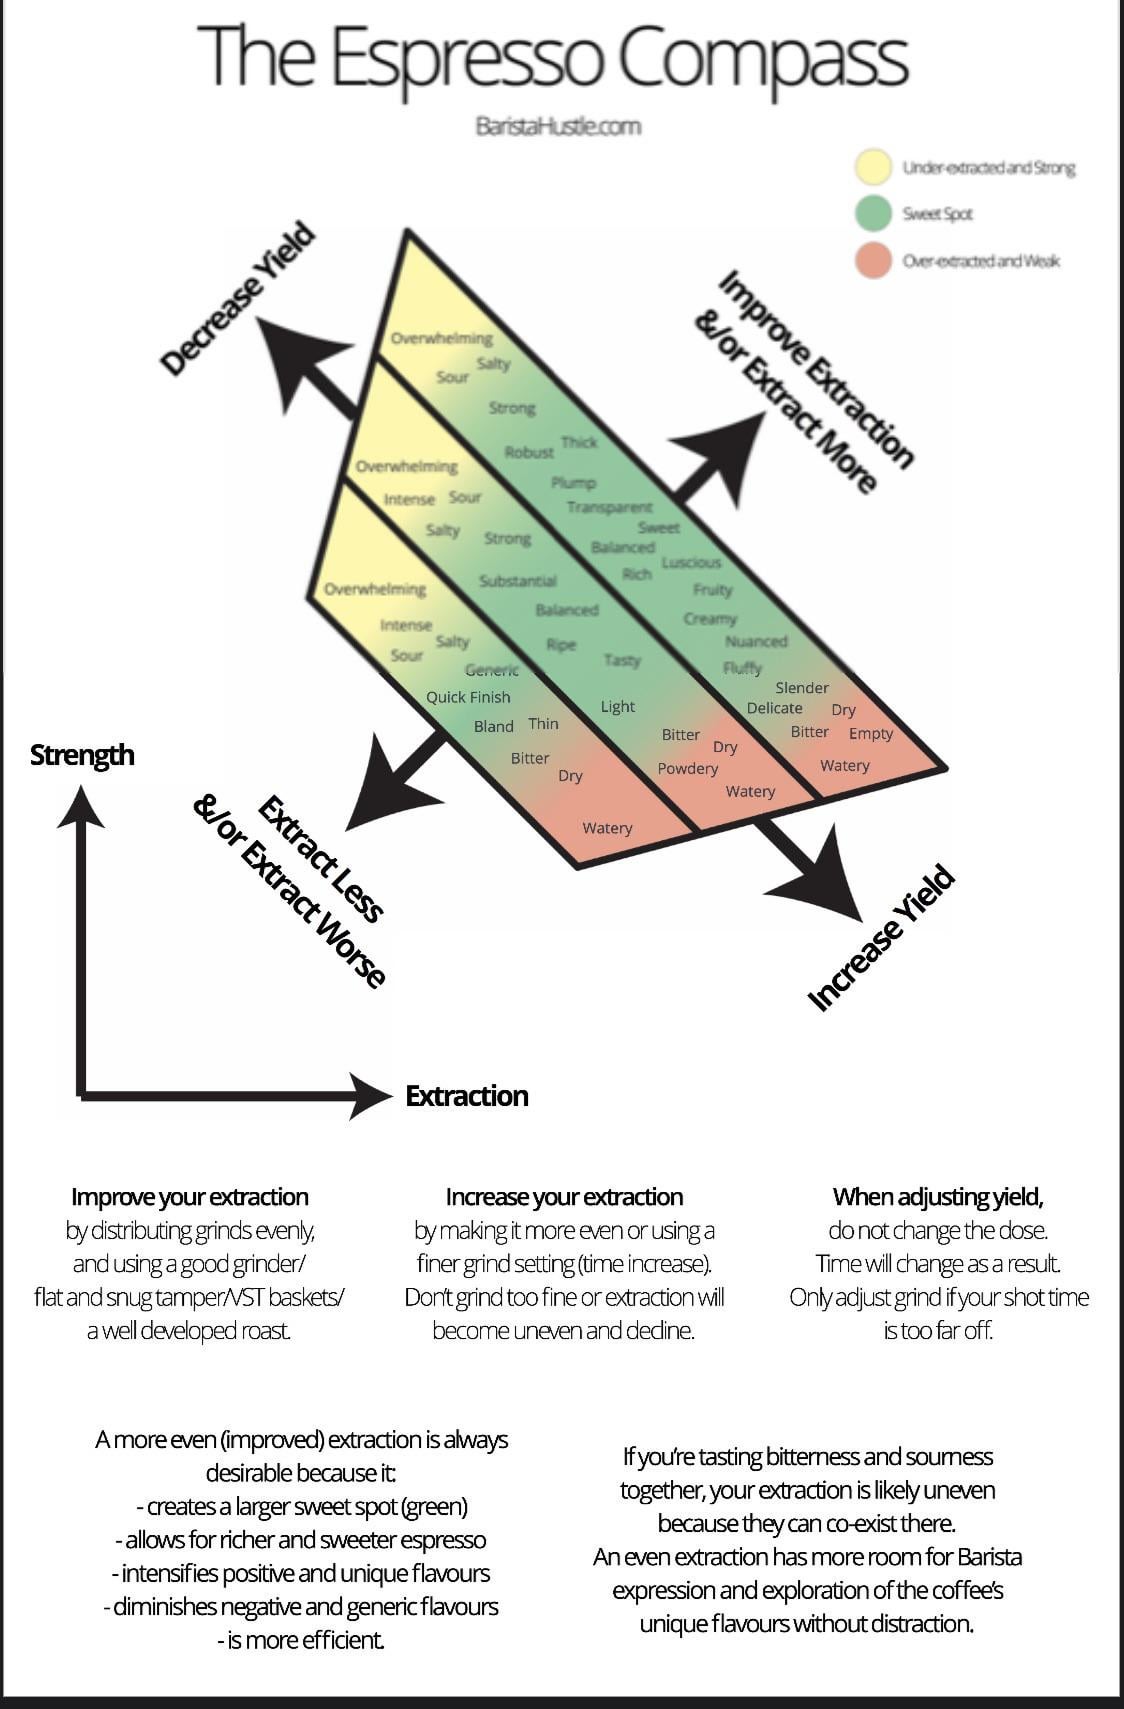

Hey, I just saw someone post desktop bg of this on a different community.


Hey, I just saw someone post desktop bg of this on a different community.

Plasticity is a pretty cool application that’s growing pretty quickly and offers perpetual licenses, so you retain access to the program once your maintenance period expires. I think it has a ton of potential to become very useful for the 3d printing space that doesn’t necessarily require the full power of a pure CAD application but needs more than something purely art-focused like 3d modeling software.
One of the greatest things is the dev takes a lot of input from the community when deciding what features are added. There’s a whole website for suggesting and voting on features to be added and several of them have already been put into development and implemented already. And on top of all that it’s, comparatively, affordable. I’m still learning it so I don’t know the full limitations of it’s usefulness for 3d printing but to me it seems very capable.
Exactly the recipe I was going to share! It’s a solid base and versatile: I play around with the number of pours before the immersion brew, how many grams are poured over versus held in the immersion, and how long the immersion is. I personally prefer a shorter immersion than the recipe, typically around 45s, but it really boils down to personal preference.
I wasn’t expecting plain PLA! Are there any issues with warping due to heat from the motor?
I’ve got the switch (size 02) and absolutely love it, find myself using it nearly daily. The flexibility it offers for playing with methods is great. My favorite recipe is inspired by the Coffee Chronicler’s, that brews as a V60 for the first half and then an immersion brew for the second half.
Recipe below taken from the Chronicler website:
Specs

This recipe can be adapted to work with doses from 15 to 26 grams of coffee and most common brew ratios.
Go for a 1:15 ratio if you have an entry-level conical grinder (such as a Baratza Encore or Hario Skerton).
Adjust to 1:16 or 1:17 if you have a more consistent grinder.

Pouring structure:

❶ 0:00 First pour: 50% total water volume (Open switch)

❷ 0:45 Second pour 50% total water volume (Closed switch)

❸ 2:00 Open the Switch and let it drain

Total brew time = 2.45-3.15.

However, the total brew time can be a bit longer if you’re brewing around the max capacity for this technique (26 g / 400 ml) or are using natural Ethopians.
Same here - I was pleasantly surprised at how similar it felt as a newcomer from Reddit to Lemmy. Sure it’s definitely buggy, but it’s version 0.18, nowhere near a 1.0 release so that was expected. Honestly I can’t get mad at that when I’m enjoying the fruits of multiple others’ labor and passion for free, when I didn’t even expect there to be a single App out there for Lemmy in the first place. Naturally I’m excited for boost to release but Jerboa feels pretty nice to me too.
Here’s a few I’ve saved over time, all variations on the same thing. Unfortunately I haven’t saved the sources alongside them: apologies to the creator as I know at least one of them was made by someone on Reddit


Awesome! Condensed milk will definitely help cover up the worst of it. Have fun dialing in!
How was it? Makes me think of something like an orea or fellow stag, though I imagine it’s just a metal filter at the bottom?


The Lagom Mini seems to be well-liked and generally recommended.
Small world!